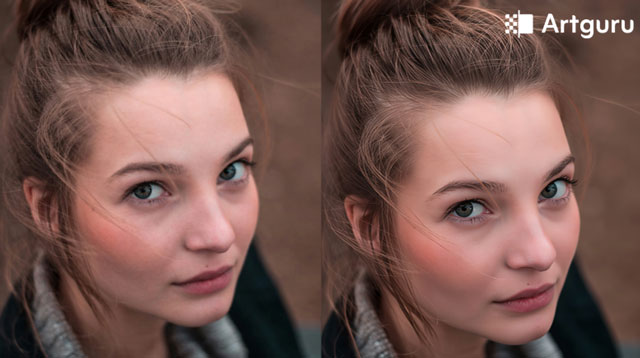
Blurry photos are kind of everywhere now. Old selfies from 2017, compressed WhatsApp images, screenshots grabbed from videos, product pictures downloaded three times too many — all of them slowly lose detail till faces start looking like watercolor soup. And weirdly enough, people notice bad quality instantly, even if they don’t know why it feels “off.”
If you’re looking for a reliable solution to this common problem, you can try a capable AI image enhancer that fixes quality issues in just a few clicks. That’s where an AI photo enhancer becomes useful in a very practical, non-fancy way.
In this guide, we’ll go through why photos lose quality in the first place, how AI image enhancement works, and exactly how to use Artguru Photo Enhancer step by step.
Why Your Photos Lose Quality
Images don’t usually become blurry all at once. It happens in layers. Tiny losses stacking over tiny losses till suddenly your picture looks crunchy around the edges.
Here are some of the most common reasons image quality drops:
Low Resolution Originals
Sometimes the original image was already small.
A 360P screenshot stretched onto a laptop screen can only do so much before pixels become visible. Same thing happens with cropped images. Every crop removes actual image data, not just space around the picture. Kind of brutal if you think about it.
This is why people search for things like:
- enhance image quality
- improve image resolution
- AI image enhancer
- upscale image to HD
They're usually trying to restore details that weren't there anymore. If you just need to bring out lost edge and texture details, you can directly sharpen image to get a crisp result fast.
Camera Limitations
Older phones and cheap cameras often struggle in:
- low light
- indoor lighting
- fast movement
- digital zoom
Noise gets introduced into the image, edges soften, and details vanish. Even modern phones can produce muddy images after aggressive processing. Some brands oversharpen too much too, which somehow makes images both sharp and blurry at the same time. Weird little contradiction there.
How Photo Enhancers Fix Image Problems
Traditional editing tools mostly rely on filters or manual sharpening. AI photo enhancers work differently.
Instead of simply increasing contrast around edges, AI analyzes patterns in the image and predicts missing details based on training data. Sounds robotic because it is robotic, but surprisingly useful.
An AI photo enhancer can:
- Recover facial detail
- Reduce blur
- Remove noise
- Improve textures
- Increase image resolution
- Upscale images to HD or 4K
- Make screenshots easier to read
The key thing is that good enhancement should still look natural.
Some tools overprocess images till people start looking waxy or glowing for no reason. Artguru’s enhancement system tries to preserve:
- original lighting
- natural colors
- image texture
- transparency in PNG files
Which is honestly a big reason people use it for ecommerce images, anime art, AI-generated images, and even old family photos.
What Makes Artguru Different
Artguru AI Enhancer focuses heavily on HD enhancement and AI upscaling.
A few practical features stand out:
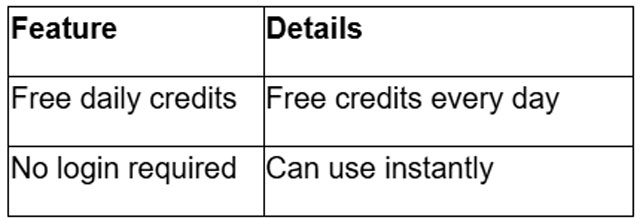
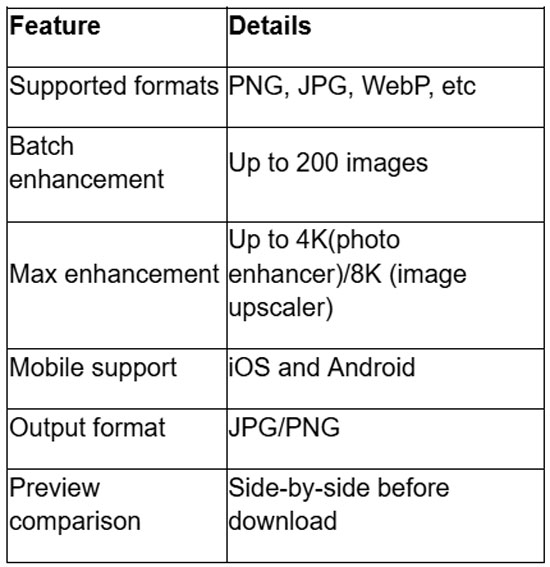
One thing users usually appreciate is that transparent PNG files stay transparent after enhancement. That’s oddly uncommon sometimes.
Also, the exported image keeps the original file name, which sounds tiny but saves annoyance when handling batches.
How to Use Artguru Photo Enhancer
Using the tool is honestly very straightforward. No software installation, no editing experience, no giant dashboard full of sliders pretending to be useful.
Step 1: Open the Image Enhancer Tool
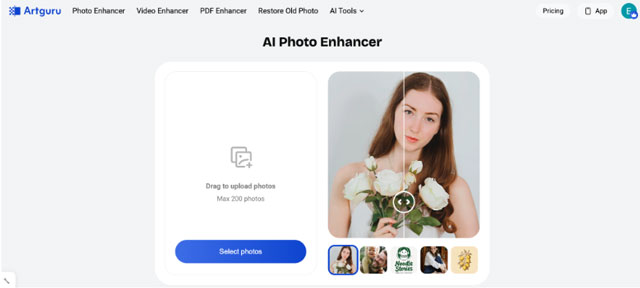
Go to the official Artguru Image Enhancer page in your browser.
The interface is clean and simple. This sounds like generic praise till you’ve opened other AI tools with forty buttons screaming at you simultaneously.
Artguru works directly online, so there’s no need to download any desktop software.
Step 2: Upload Your Image
Click the “Select Photos” button and upload the image you want to improve.
The AI photo enhancer supports:
Batch enhancement supports up to 50 images at once, which is genuinely useful if you're handling content libraries or store products.
No registration or login is required to start. That’s honestly refreshing nowadays.
Step 3: Start the AI Enhancement and check the Preview
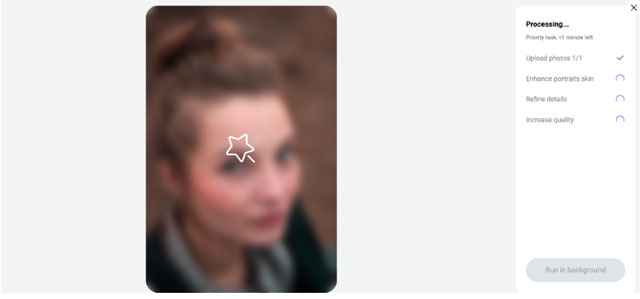
After uploading, hit “Start.”
The system automatically begins processing the image using AI enhancement technology.
Depending on the selected resolution, different amounts of credits may be used. The free version includes watermarks, but users can still enhance images into HD quality within the free daily quota.
Artguru’s enhancer focuses on:
- sharpening details
- reducing blur
- improving clarity
- preserving original lighting
- avoiding unnatural color shifts
That last part matters more than people realize. Some enhancers accidentally turn warm images cold or make skin tones weirdly orange-ish. Artguru generally avoids that kinda thing.
Step 4: Download the Enhanced Image
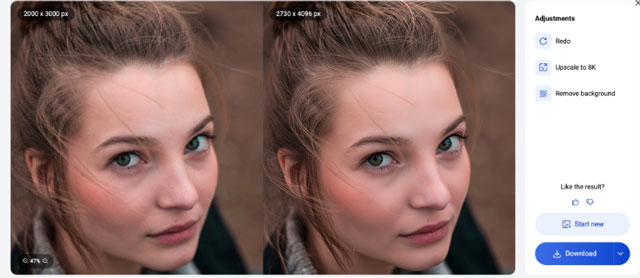
If you're satisfied with the result, simply download the enhanced image.
The output:
- keeps the original file name
- exports as JPG/PNG
- preserves transparency for PNG images
- maintains natural image appearance
The process works on desktop and mobile devices, including iOS and Android, without intrusive ads cluttering the screen every six seconds.
Conclusion
Image quality problems happen for all kinds of annoying reasons — compression, resizing, bad lighting, old cameras, small size screenshots, endless reposting. Eventually details disappear and photos stop feeling crisp.
Artguru Photo Enhancer supports HD and 4K enhancement, batch processing, transparent PNG preservation, and mobile access without requiring registration. This honestly removes a lot of friction people usually expect from image editing software.
And maybe that’s the nicest part about it. The whole thing feels less like “editing” and more like quietly fixing what compression and bad pixels messed up in the first place.