Need to remove the background from an image? You’re not alone. Creating a transparent background is one of the most common tasks in digital design, whether you're a small business owner, a marketer, or just someone trying to make a graphic for social media. A clean, transparent background makes your subject pop and allows you to place it seamlessly onto any design, color, or photo.
In the past, this required complex software and a lot of patience. Today, you can get professional results in seconds without spending a dime. This guide will show you exactly how to create transparent backgrounds for free, focusing on the best and fastest methods available in 2026. We'll cover the top online tools, explain why transparency is so important, and provide tips for getting a perfect cutout every time.
Why a Transparent Background is a Must-Have
Before we get into the "how," let's quickly cover the "why." An image with a transparent background is an essential asset for almost any digital project. The transparent format, usually saved as a PNG file, allows you to isolate the main subject of a photo.
Here’s why it’s so valuable:
* Professional Branding: Your logo needs to work everywhere. A logo with a transparent background can be placed on your website, email signatures, social media banners, and promotional products without a clunky white box around it.
* Clean E-commerce Photos: Online stores need consistent product images. Removing the background lets you place all your products on a uniform color, creating a clean and professional look that helps customers focus on what you're selling.
* Versatile Design: Graphic designers and social media managers constantly layer images. A transparent background lets you place people, products, or objects into new settings, create custom graphics, and design engaging posts without limitations.
* Polished Presentations: Adding images to a presentation or document? A transparent background ensures your visuals blend in perfectly with your slide design instead of clashing with it.
Top AI-Powered Tools for Instant Results
The fastest and simplest way to get a clean cutout is by using an AI-powered tool. These platforms analyze your image, identify the subject, and remove the background automatically. For anyone who needs quality results without a learning curve, a dedicated online tool is the best choice. This approach saves you from the tedious manual work of outlining a subject, which can take a long time and requires a steady hand.
The leader in this space, for its simplicity and accuracy,is an incredibly effective Free Image Background Remover. It uses advanced AI to deliver precise cutouts in just a few seconds. You don't need to sign up for an account or download any software. You simply upload your photo, and the tool does all the work for you, providing a high-quality image with a transparent background ready for download. It's the ideal solution for quick, everyday tasks.
For those who want to take it a step further, the process is just as simple. Once the background is gone, you can download the image as a PNG file to preserve its transparency. This is where a dedicated Free Transparent Background Maker becomes invaluable. It not only removes the original background but also ensures the final output is in the correct format, ready to be used in any project. This one-click solution is perfect for creating professional product photos, logos, and marketing materials without any hassle.
How to Use an AI Background Remover: A 3-Step Guide
Using an automated tool is incredibly straightforward. Here’s the typical process:
1. Upload Your Image: Drag and drop your file onto the website or click the "Upload" button to select a photo from your computer.
2. Let the AI Work: The tool automatically detects the subject and removes the background. This usually takes less than five seconds.
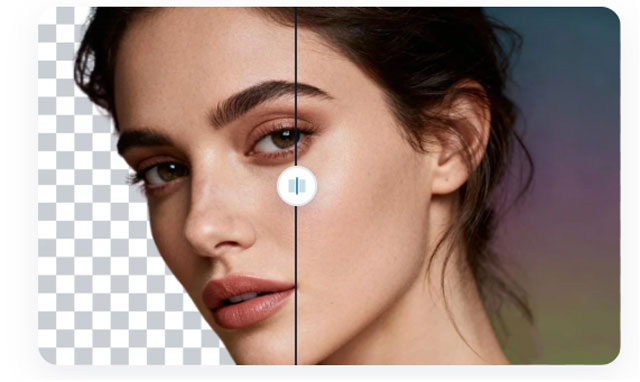
3. Download the Result: Your image will appear with a transparent background (often shown as a checkerboard pattern). Click the "Download" button to save the new PNG file to your device.
This simple process has made professional photo editing accessible to everyone, regardless of their technical skill.
Other Free Methods to Make a Background Transparent
While AI tools are the fastest, other methods are available if you prefer using desktop software or have more complex editing needs. These options offer more manual control but come with a steeper learning curve.
Using Free Desktop Software (GIMP)
GIMP (GNU Image Manipulation Program) is a powerful, open-source alternative to Adobe Photoshop. It’s packed with professional tools, but it can be intimidating for beginners. If you're willing to learn, it gives you complete control over your edits.
How to create a transparent background in GIMP:
1. Add a Transparency Layer: Open your image in GIMP. In the Layers panel, right-click your layer and select "Add Alpha Channel." This is a crucial step that enables transparency. If the option is grayed out, your image already has one.
2. Select the Background: Use the "Fuzzy Select" tool (the icon looks like a magic wand) to click on the background. Hold the "Shift" key while clicking to add more areas to your selection. For images with complex backgrounds, you may need to use the "Paths Tool" to manually trace around your subject.
3. Remove the Background: Once the background is selected, simply press the "Delete" key on your keyboard. You'll see the checkerboard pattern appear, which indicates transparency.
4. Export as a PNG: Go to `File > Export As`. In the dialog box, name your file and make sure the file extension is `.png`. Click "Export" to save your new image.
Using Built-in Tools on Your Computer
Your operating system also comes with basic image editors that can sometimes handle simple background removal tasks. The results are often less precise than dedicated software, but they can work for images with very simple, solid-color backgrounds.
On Windows (Paint 3D):
1. Open your image in Paint 3D.
2. Select the "Magic Select" tool from the top menu.
3. Adjust the selection box to fit around your main subject and click "Next."
4. The tool will try to guess the subject. Use the "Add" and "Remove" brushes to refine the selection.
5. Once you're happy, click "Done." The subject will become a separate object you can copy and paste into another project.
On macOS (Preview):
1. Open your image in the Preview app.
2. Click the "Markup" button (the icon looks like a pen tip).
3. Click the "Instant Alpha" tool (the icon looks like a magic wand).
4. Click and drag on the background color you want to remove. As you drag, more of that color will be selected.
5. Once the background is highlighted in red, press the "Delete" key. Preview will ask to convert the image to a PNG file; click "Convert."
PNG vs. JPG: Why File Format Matters
When you’re working with transparent images, the file format you use is critical. Not all image formats can handle transparency.
* PNG (Portable Network Graphics): This is the format you need. PNG files support what's called an "alpha channel," which is an extra layer of information that tells a program which parts of the image should be transparent and to what degree. It's the standard for logos, icons, and any image that needs to be placed over other content.
* JPG (Joint Photographic Experts Group): This is one of the most common image formats, especially for photos. However, JPGs do not support transparency. If you save an image with a transparent background as a JPG, the transparent area will automatically be filled with a solid color, usually white.
Always save or export your final image as a PNG to ensure your background stays transparent.
Tips for a Perfect Cutout
No matter which tool you use, the quality of your original photo plays a big role in the final result. Here are a few tips to help you get a cleaner, more accurate cutout:
* Use High-Resolution Images: A sharp, clear photo gives an AI tool more data to work with, resulting in a more precise edge.
* Ensure Good Contrast: An image where the subject stands out clearly from the background is much easier to process. A person in a dark shirt against a light wall is easier to cut out than someone standing in front of a busy, colorful background.
* Check for Fine Details: Pay close attention to hair, fur, or semi-transparent objects. Advanced AI tools are getting better at handling these details, but a busy background can still cause issues.
* Simple Backgrounds are Best: If you have control over the photography, shoot your subject against a solid-color background like a white wall or a green screen. This makes the removal process, whether manual or automated, much simpler.
Putting It All Together
Creating images with transparent backgrounds is no longer a task reserved for design professionals. With the powerful and free tools available in 2026, anyone can remove a background in just a few clicks.
For speed, convenience, and excellent results, an AI-powered online tool is your best bet. It automates the entire process, delivering a clean PNG file ready for any project. For those who need more granular control and are willing to learn new software, free desktop programs like GIMP offer a robust set of tools for the job.
By choosing the right tool and starting with a quality image, you'll be able to create professional graphics that make your brand, products, and creative projects shine.